


FAQ
How do you store UV nail polish correctly?
There are a few things to consider when storing UV nail polish correctly to ensure the product lasts a long time.
What do you need to keep in mind?
1. UV nail polishes should be stored in a dark and dry place UV nail polishes should be stored in a cupboard, drawer or special container in a dry place protected from the sun. The optimal temperature for storage is between 10 and 25 °C.
2. Store the bottle vertically
UV nail polishes should be stored vertically with the cap facing upwards. This prevents the product from leaking or drying out.
3. Close the bottle correctly
The most common cause of problems with UV nail polish is inadequate closure. When we perform a manicure and hold the bottle too close to the lamp, its rays can significantly affect the consistency of the product. For this reason, these products should be correctly closed and stored at an appropriate distance from the switched on LED lamp
4. UV Nail polish should not be used outdoors.
How do you properly cure UV nail polish under a LED lamp?
Every UV nail polish, both base and top, needs a certain amount of time to cure properly. For a quick overview, we have created tables that indicate how long the product needs to cure. You can find them here:
a) Curing time base table
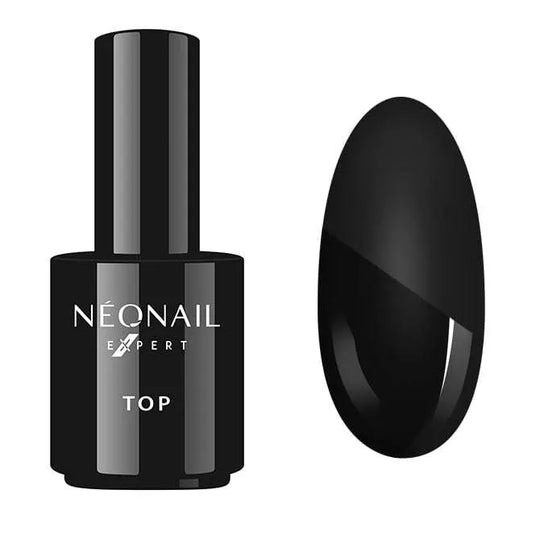
b) Curing time Top table
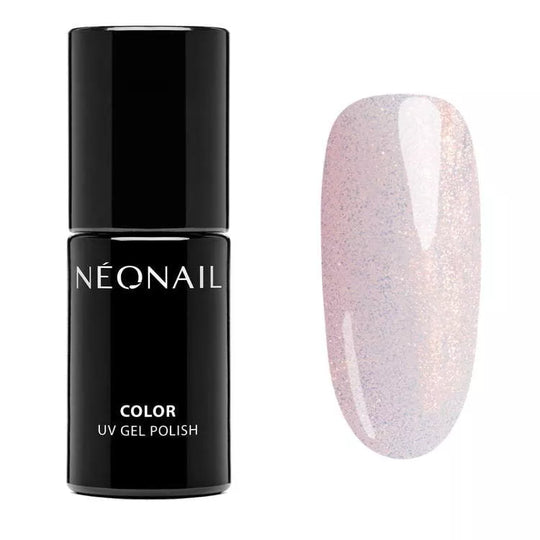
c) Curing time UV nail polishes
It's worth knowing what power your lamp has, so you can look it up in the table and check how much time is needed to cure individual products. Why is this so important? A manicure that is not fixed long enough cannot cure properly. This causes the UV nail polish to easily chip off the nail bed and has a negative effect on the durability of the manicure.
Why Does UV Nail Polish Become Un even When Applied?
The correct preparation of the nail plate is the basis of any long-lasting UV nail polish manicure. After you have removed the cuticles and mattified the nail plate with a polishing file, clean the resulting dust with a silicone brush . The prepared nail plate should be wiped with a lint-free tissue soaked in cleaner. Only then should you start with the UV nail polish styling .
Preparing the nail plate makes the manicure easier. The varnish can now be applied evenly in a thin layer. If the cuticles and dust are not removed properly, they will mix with the applied products and cause unsightly bumps.
How do i prepare the nail correctly?
To prepare the nail correctly we begin by gently removing excess cuticle, using a wooden stick or cuticle pusher along with cuticle nippers where necessary. Some may wish to use an E-File-It is essential to have had the relevant training in the use of an e-file if you wish to use this method. If you have a problem removing the cuticle (ie: they are too hard) you can use a cuticle remover to soften them. The next step is to shape the nails with a nail file. Remember to file in 1 direction with a smooth movement. We then matte the nail plate with a buffer or polisher. Finally, we cleanse the nail plate to ensure excess oil/dust is removed.
Why does UV nail polish peel off?
There are several reasons why the nails may be flaking. One solution is to completely remove the cuticle from the nail plate. If this is not done, the UV nail polish will simply flake off.
How exactly does it work? With the Cuticle Remover you can easily remove unwanted cuticles within 10 seconds. If you prepare the nails in this way, the UV nail polish can be applied very easily and you can create a long-lasting manicure.
It is also important how the products are applied to the nail plate - you should be precise and careful, taking care not to paint the area around the nails. If the product is accidentally applied to the cuticle and then the manicure is cured in the lamp, the entire styling will quickly chip off. If the varnish gets on your skin, remove it with a wooden stick and only then cure the manicure under the lamp.
If you keep these two important points in mind, you can improve the durability of your manicure.
Why does the top coat yellow?
Too long an exposure time, a top layer that is too thick, frequent sunbathing/visits to the solarium or frequent contact of the nails with chemicals can lead to yellowing of the top coat.
Why are my nails going navy after using Top Shine Bright ?
Top Shine Bright has a high gloss finish and also a filter that reflects UV light (To prevent yellowing). Therefore especially on Black or very dark nails this can appear as a navy sheen over the nail. We recommend that you use an alternative top coat for very dark nails – DRY TOP is recommended.
Why has my gel polish cracked?
The natural nail is very flexible. It bends. This is why on an odd occasion you may experience cracks. How to prevent Cracking and improve durability: If we have a very thin, flexible nail plate or longer nails it may happen that the gel polish will crack and create a 'spiderweb' on the surface of the nail top. To fix this it is possible to buff away the top layer and reapply the top coat of choice.
Why does the paint Gel burn under the lamp?
While the gel is curing under the lamp, particles move. The more particles there are in a product, the faster they move, which can cause a burning sensation. If too much nail polish or primer is applied, or the nail plate is weakened and thin, the unpleasant sensation can be more pronounced.
It is recommended to apply two thin layers of the base or single-phase gel. The nail is then built up with the third layer. Another option is to briefly take your hand out of the lamp and wait until the burning sensation subsides, then put it back under the lamp.
Does UV nail polish damage natural nails?
If you use our products correctly, you don't need to worry about the health of your nails. One of the most common causes of damaged nails is improper matting (superficial removal of the nail plate). The natural nail plate consists of around 100 to 150 layers. During preparatory matting, only the first three layers of the natural nail are removed with a buffer. Finally, the nails and cuticles should be nourished with a nourishing oil.
What is the difference between Base Hard and Base Extra?
The Base Hard is a classic primer for UV nail polish. Only a thin layer of the Base Hard is applied and then hardened.The Base Extra is a base that can not only be used as a classic primer for UV nail polish, but can also build, reconstruct and lengthen nails up to 7 mm.
Which of the bases would be suitable for me?
If you are a beginner and just starting out on your adventure with gel polish, or you would like an easy base to remove we would recommend the following bases:
• HARD BASE- This has a thin consistency that makes it easier to work with. It also allows for the product to be applied in a very thin layer. It can be super easy to remove with acetone.
• HARD BASE VITAMINS- in the case of a problematic nail hard base vitamins would be perfect as it is a classic vitamin base. Its composition includes silk proteins, a complex of vitamins, shea butter extract and keratin. It has a medium to thick viscosity and can easily be removed with acetone.
• BASE 6 IN 1 SILK PROTEIN- This base would also work great for problematic nails. It is a medium to thick viscosity and contains silk proteins. With its help you can build and extend the nail up to 1cm. A thin layer of the product can be removed with acetone, a thicker layer can be removed using an E-File.
• REVITAL BASE FIBER- behaves in a similar way but it contains fibers, that can help you build and extend up to 7mm , and comes in transparent and a number of beautiful shades ranging from Milky French to Rosy pinks. It can be removed in the same way as Base 6 in 1 Silk Protein. If you require a base to extend the nail the following bases can be used:
• BASE EXTRA- The most popular base to use to extend the nail would be Base Extra, which allows you to extend the nail up to 7mm. It also allows you build up the natural nail slightly without an extension. It is also a great proposition for a problematic nail.
• BASE 6IN1 SILK PROTEIN AND REVITAL BASE FIBER as described above and their colour equivalents would also be great options for extending the nails. If you require a base with colour, such as a nail that is discoloured or you would like to emphasize the colour of pastels more we would recommend using the following:
• BASE EXTRA COVER- This has the same properties as the Base Extra we described earlier, however we have added a beautiful delicate pink colour to it.
• COVER BASE PROTEIN- We added colour to Base 6in1 Protein, this is how Cover Base Protein was born. Our collection of colours is always expanding so take a look to see which you like best.
How do i apply black and white colour gel polish?
Black and White Gel polish are extremely pigmented colours and should be applied in 2 very thin layers on the nails. Each time we must cure in our 48W LED lamp for 60 seconds. Remember not to cleanse between layers. Be careful that the colour does not flow into the sidewalls because it will then wrinkle and as a consequence it will come off the nail plate after some time.
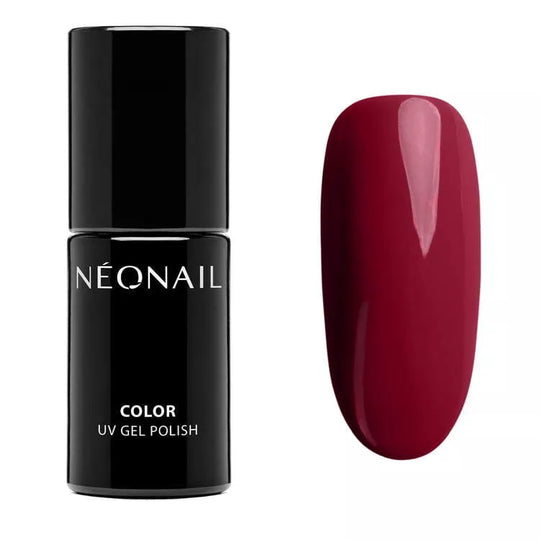
What is the best way to use red gel polish?
Red has always been a classic and tempting choice of colour for many years and has a special place in our hearts. We have a wonderful selection for you to check out on our website including our iconic Sexy Red the most classic, feminine colour the world has ever seen! We have some great suggestions for how to style a red manicure below
a) With a glitter accent nail - It looks great with either a glitter gel polish nail or one that is created using our magnificent pigmented dusts.
b) With a combo of black and white - Classic Red always works great in combination with a beautifully subtle black and white design
c) More great ideas: You will find more great ideas and inspiration on our social media pages. Don't forget follow us on Instagram to keep up to date with all of the latest products, news and gossip!
Can pregnant women wear neonail gel polish on their nails?
No contraindications have been found. The nail plate is not essentially living. The substances within the gel polish cannot penetrate into the bloodstream. However, a pregnant woman should avoid contact with chemical preparations. Therefore, it should be taken into consideration that all gel polish and acetone have vapors that should not be inhaled.
How long will my Simple 3in1 manicure last?
The durability of Simple 3in1 polishes averages around 14 days depending on the condition of the nail plate.
Is it necessary to apply a primer before applying Simple 3in1 polishes?
Primer is dedicated to a problematic nail plate only. Simple 3in1 does not require primer.
How many sets of nails will a bottle of Simple 3in1 produce?
The length of time that the product will last depends on the size and length of the nail plate. On average a capacity of 7.2ml will be enough for around 8 sets of nails.
I'm allergic to Gel Polish, Can i use Simple 3in1?
Simple 3in 1 has been tested on people with sensitive skin under the supervision of a dermatologist and has not shown any adverse reactions. However, if you were allergic to gel polish early, we recommend to carry out a test on 1 nail. This needs to be a 24h test, apply the product only to the prepared nail plate and cure for the correct time. DO NOT apply the product to the skin.
What do the silk proteins contained in Simple 3in1 polishes do?\
The Silk proteins contained in Simple 3in1 help to protect against mechanical damage to the nail.
Can Allergic Reactions and Skin Abnormality Occur?
In rare cases, allergic reactions or skin abnormalities may occur. If redness, blisters, swelling or other skin abnormalities occur, remove the UV nail polish immediately and consult a dermatologist.
Does the curing time of NEONAIL products depend on the power of the lamp?
The curing time depends on various factors, including the power of the lamp. The color of the varnish can also make a difference, as darker colors usually require a slightly longer exposure time. Before the manicure, it is recommended to carefully read the instructions for use provided with the lamp and follow the curing times indicated. The curing time may vary depending on the distribution of the diodes and the distance of the nails from the lamp.
Are neonail products tested on animals?
The environment is very important to us, which is why no animal has to suffer to produce our products.
What causes bubbles to form during application?
Cause:
a) improperly prepared nail plateb) layer of gel polish is too thickc) Lamp is too weak or not a sufficient amount of exposed) Mixing too vigorously before applicatione) Too fast or inaccurate application of the product. Tip: To ensure an optimal manicure, the nails must be properly matted and degreased. In addition, only thin layers of varnish should be applied. The product should not be shaken too much in the bottle and should be applied to the nail plate with calm and gentle movements. After applying the varnish, wait a few seconds before placing the hand under the lamp.
Why is UV nail polish difficult to remove?
Sometimes removing gel polish can become a bit of a problem. The polish stubbornly sticks to the natural nail, even though you soaked it in acetone. At this point is vital that you do not try and scratch it off by force from the natural nail as this has the potential to really damage the nail plate.
The causes:
-a) The top layer was filed too hard causing the product to penetrate into the deeper layersb) Combining products from different brandsc) Using too little acetone or not allowing enough time for the acetone to penetrate the productd) Over-curinge) Not ensuring the top layer is matted before removal.Tip: Use products from the same brand to ensure a synchronized manicure. Make sure you applied the proper amount of acetone and allow enough time for the nail to soak. Gently scrub the nail with nail file or buffer.
Can you only apply the UV nail polish color?
For optimal hold, the correct preparation and removal of UV nail polish is as follows:a) Carefully mattify the nail with a polishing file or buffer, remove any nail dust with a dust brush brush if necessary and clean the nail with a tissue soaked in cleaner.b) Apply Nail Prep (a stronger degreaser) to increase the adhesion of the UV nail polish color to the natural nail plate. Wait until the product has evaporated.c) Apply a first thin layer of the chosen UV nail polish color (pay special attention to avoid the cuticle area so that the product does not come into contact with the skin) and cure in the LED lamp for 30 to 60 seconds (Please note: the darker the color, the longer the curing time).d) Apply a second, equally thin layer of UV nail polish color (again, make sure to avoid the cuticle area so that the product does not get on the skin) and allow to harden in the LED lamp for 30 to 60 seconds (Please note: the darker the color, the longer the curing time).e) After curing, the sticky sweat layer is removed with a tissue soaked in cleaner.f) Finally, apply a layer of top coat to seal the styling and cure in the LED lamp for 30 to 60 seconds.To remove the UV nail polish from the nails, roughen the shiny layer with a polishing file. Then press the Nail Foil Wraps soaked in acetone firmly onto the nail plate and seal them tightly around the finger.After about 10 minutes, the remaining nail polish can be removed with a rosewood stick or a pusher and then smoothed with a polishing file.For extra care, apply nail oil.
Can you apply UV nail polish over gel?
Yes, you can apply UV nail polish to gel. It should be applied in the same way as on a natural nail plate. If the nail is strong and well matted, you can skip applying Base Hard or Base Extra. UV nail polish applied in this way is durable and does not chip. When removing it, it is recommended to do this with a nail cutter or nail file. Acetone is not needed.
Can nails be extended with UV nail polish?
Yes, it is possible to extend nails with UV nail polish. Base Extra is used to extend nails by up to 7 mm. First, a template is attached, then Base Extra is applied to the nail plate. After applying 2-3 layers, each layer is hardened individually. The rest of the manicure process can then continue as usual.
The varnish doesn't glitter/shine - why?
There are several reasons why UV nail polish lacks shine. It could be because the exposure time is too short or because the polish is cleaned too quickly with the cleaner.Tip: After removing the nails from the LED lamp, you should wait until they have cooled down completely. Only then can the cleaner be applied.
Why does the polish shrink on the nail before/after it is placed under LED lamp?
If a layer of varnish is applied that is too thick, the UV nail polish may shrink before curing under the lamp. To avoid this, the nail plate should be thoroughly degreased before applying the base.If the paint shrinks after curing under the lamp, the cause may be insufficient lamp performance. Since devices are subject to natural wear and tear, they must be replaced with new ones over time.To avoid excess varnish, the brush should be wiped off before application. For optimal preparation of the natural nail plate, the use of primer and nail prep is also recommended. The correct exposure time under the LED lamp should also be observed.
What causes the yellowing of the nail plate?
There are various reasons for the yellowing of the nail plate. Combining products from different brands, applying too little base, inaccurately removing the hard base, applying too much primer or exceeding the recommended exposure time can lead to this.Tip: The right amount of base and primer should be applied to optimally protect the nail plate. To avoid unwanted reactions and identify the cause of possible problems, it is recommended to use products from only one brand. It is also essential to respect the recommended exposure time for each layer.
What causes spots on neon colors?
The color can change color if the product is overheated in the lamp, ie the curing time is too long. This causes the color to absorb too much light and spots to appear, but these disappear after about an hour. This happens more often if you apply the polish to each nail individually and let the whole hand cure again and again.Tip: It is very important to control the curing time and avoid applying 3 coats of paint. If necessary, you can apply a white paint as a base under the chosen color.
Why is the color of the varnish too thick?
Some paints may become slightly thicker under the influence of low temperatures, this happens most often in the winter season.Tip: If you experience difficulties during the application of a colour, for example with glitter or highly pigmented varnishes, you can warm the varnish bottle in your hand or place it in a bowl of warm water (30-50 °C) for about three minutes.
Why is it difficult to smooth the UV nail polish onto the base?
If a layer of base is applied that is too thick, the base layer is not cleaned with a dry, dust-free cotton pad, or the exposure time is too short, the UV nail polish may be difficult to smooth onto the base.Tip: If the UV nail polish is difficult to smooth, it may help to apply a thinner layer of base or extend the exposure time.
Why does UV nail polish chip?
If the nail plate is incorrectly prepared, matted and/or degreased, a layer of polish that is too thick is applied, the free edge of the nail is not properly coated or the nail plate is too weak or split, the UV nail polish may splinter.Tip: Before starting the manicure, the nail plate should be properly prepared. First, the nail plate is mattified with the buffer and then degreased with the cleaner. The primer is applied to extend the durability and should be allowed to soak in for a moment. Then very thin layers of UV nail polish are applied and each one is cured under the LED lamp. When working with a natural nail plate, it is important to coat the free edge of the nail well by applying the polish to the front edge of the nail with each layer.
Why does UV nail polish of the gel chip off?
Because the natural nail plate is very flexible and bends, it can happen that the UV nail polish cracks. If the nail plate is not prepared correctly, ie not sufficiently matted and/or degreased, chipping may occur. . A layer of UV nail polish or gel that is applied too thickly, or unsecured nail edges can also cause this.Tip: If you have very thin, flexible nails or long nails, the UV nail polish may crack and a "spider web" may form on the surface of the top coat. In this case, the nails should be refreshed or matte and the top coat should be applied again. For the application of the gel, the nails should be thoroughly prepared before starting the treatment. After matting the nail plate with the buffer, the primer is applied to increase the adhesion of the product. Then a thin layer of the gel is applied and cured under the LED lamp. This step is repeated 2-3 times before the nails are cleaned with the cleaner. It is especially important to secure the free edges. To do this, a thin layer of the product should always be applied to the front edge of the nail during the manicure.
Why does UV nail polish come off the nail plate?
If the nail plate is prepared incorrectly, the natural oily nail plate is not degreased sufficiently, a layer of nail polish is applied that is too thick or the exposure time is too short, the UV nail polish can come off the nail plate.Tip: The nails should be thoroughly matted and degreased before a very thin layer of UV nail polish is applied. Each layer is cured individually under the LED lamp, without cleaning the nails with the cleaner between each layer.
Why doesn't the gel harden?
If the power of the LED lamp is too low or too thick a layer of gel has been applied to the nail, the gel may not harden. However, if the gel has hardened and the so-called sweat layer (dispersion layer) is still on the nail, the nail should be cleaned with the cleaner.Tip: The gel should be applied in thin layers and each layer should be cured under the LED lamp for the appropriate exposure time. If the gel still does not harden, it may be necessary to replace the lamp.
Why does the gel harden in the packaging?
If the gel has hardened in the packaging, it may have been near the lamp and the gel was exposed to UV radiation. Another reason for this may be a leaky packaging, or leaving the gel packaging open.Tip: After treatment, the gel packaging should be carefully closed and stored in a dark place. After the gel has been applied to the nail, it should not be placed too close to the LED lamp.
Why doesn't the gel stick to artificial nails?
If the artificial nails are not sufficiently matted, the gel may not stick to the artificial nails. A layer of gel that is applied too thickly, an expired product or too short an exposure time can also lead to this problem.Tip: Mattify the artificial nails with a 100/180 file and then apply the primer. Then apply a thin layer of gel and repeat the process 2-3 times. Finally, clean the nails with the cleaner.
Why are the bulbs flashing in my nail lamp?
The reason why your bulbs may be flashing may be down to a number of reasons:• A defective transformer- Ensure you use the correct cable that is provided with your lamp, you may need a replacement if you are using the correct cable for your lamp.• Incorrect bulbs for the lamp. If you have this issue with your lamp you may have to replace the transformer or the bulbs.
What difference does the power of a nail lamp make?
LED lamps are a necessity to produce gel polish manicures. Double the power of the LED lamp means that we shorten curing time. Therefore, the higher the lamps power the quicker the gel polish will cure. in addition, the time that it takes for the gel polish to cure will also depend on: the number of bulbs and their positioning in the lamp and the distance of the bulbs from the hand.
For any further support on our products please contact us for free nail technician support